
TEMPLATE DOCUMENTATION
Read this page before making any changes to the template. Also, please register for our template restyle course:
*By the way, this page is pass-protected. You can just keep it in the Not Linked section and consult it when you need to
What's covered in this guide:
How to get started / Watch the course
Access CANVA graphics
Section borders
Uppercase subhead (h4)
Tilted handwriting ( h4 bold)
Banner reveal on scroll on Home 2
Testimonial slider with a border
How to add podcast episodes / Summary block with podcast episodes
1. How to get started / Watch the course
Firstly, duplicate all the pages you plan to use before making any changes to the design. This way you will save the original design of the layouts for your future reference. Many things can go wrong when you start designing, and some of them are difficult to reverse. Duplicating the pages beforehand will safeguard your customization process. If you mess something up, you can always start fresh. You can duplicate pages within one website as many times as you need.
To duplicate a page click a small gear icon next to it. In the general settings scroll down and click Duplicate page. You can put these duplicated pages in the Not-Linked section, so no one sees them except for you. To do this, just click the name of the page and drag it down.


I also advise you to watch the course and prepare your content before tweaking the template. The course walks you through Squarespace website builder and explains how to customize your template using basic design principles. Watching it before jumping into tweaking ensures the best possible outcome.
2. Access CANVA graphics
3. Section borders
The Identity template owes its elegant look to the section borders we added with help of some CSS. The thin black lines between the sections give the template its casual chic. Let’s take a look at how they work, in case you need to change the color or thickness, or get rid of them altogether.
Go to Design > Custom CSS and find this snippet of code. The thickness is set in pixels and is now set to 1. The color is added as a HEX code (a hashtag and a number that follows it) and is set to #191919 (black). You can manipulate both thickness and HEX color code.
// Section borders
.page-section {
  border-bottom: 1px solid #191919;
}
If you need to get rid of the borders, simply delete these lines from the code and click Save in the upper left corner of the page. If you change your mind, you can always come back to this page and copy the code to insert it back in your Custom CSS.
4. Uppercase subhead (h4)
All the headings on Squarespace websites use one font. It is set in Design > Fonts > Headings and applies to h1, h2, h3, h4. In this template, however, we gave h4 a different font. While h1, h2, and h3 use Thrillers, h4 uses Commuters Sans. Let me show you how to achieve this with a bit of CSS.
Firstly, we need to add a new font, Commuters Sans in our case, to your website. Go to Design > Fonts > Miscellaneous and choose the one you like in the collection of fonts.
Now go to Design > Custom CSS and find this snippet in the code:
// Typography

h4 {
  font-family: commuters-sans;
  text-transform: uppercase;
  font-weight: 600;
  line-height: 1.8;
  letter-spacing: 0.09em;
}
Change the name of the font (after font-family:) for the one you have set in Miscellaneous. You can also tweak more settings here: choose your font to be uppercase or lowercase, change weight, line-height, letter-spacing. Click Save in the upper-left corner, when you are done tweaking and you like the final look.
5. Tilted handwriting ( h4 bold)
One more signature feature of this template is a beautiful script font that adds a nonchalant atmosphere to the design because it looks like handwritten notes. This is a Diamond Lady font. Important note: this is a custom font and it is not included with the template. To publish a website using this font, you need to buy your own license. We have bought it on Creative Market.
If you have a different handwritten font in mind, follow the first three steps of this tutorial on our blog to upload it to your website before coming back to this tutorial.
The snippet that is in charge of making the Diamond Lady font work on the website. In order to apply it select the text, set it to Heading 4, and make it bold. Voila! The text transforms into a handwritten scribble. It is not actually bold, as can you see. But we have CSS convert any bold Heading 4 to Diamond Lady font.
It is a bit counterintuitive, but we have to go this far because Squarespace doesn’t allow us to add any more font through the standard settings.
If you have uploaded another custom font to the website, swap the name of the font in this snippet. You are also free to tweak font size, font weight, line height, transform your text (e.g. make it uppercase), and even rotate it (right now it is rotated to -5 degrees).
h4 strong {
  font-family: "Diamond Lady";
  font-size: 45px;
  font-weight: 300;
  line-height: 1.2;
  text-transform: none;
  display: block;
  transform: rotate(-5deg) !important;
  margin: auto;
  position: relative;
  font-weight: normal;
  letter-spacing: 0px;
}
6. Banner reveal on scroll on Home 2 page
The second option for the Home page has a long first section with a headline that kind of sticks in place when you scroll down. This cool effect is achieved with some custom CSS. Here is how it is applied in case you need to recreate on a duplicated page.
Firstly, you need to install this useful Chrome extension, that shows IDs of sections and blocks in Squarespace. It will come in handy in the future because many Squarespace tutorials require it. Once you install it, you will find it in your extension bar in the upper right corner of the browser – it looks like a grid. Click it once, while browsing any page on a Squarespace website, and you will see IDs of sections (blue ones), IDs of blocks (red ones), and IDs of collections (green ones). Click the extension icon once more, if you want to turn them off.
Then, go to Design > Custom CSS and find this snippet. As you can see, there are already some block IDs inserted here.
//Sticky headline inside a fluid block
section[data-section-id="6303773c1b03ea72e5b321c1"] {
  .fe-block {
    position: sticky;
    top: 0;
  }
}
Turn the extension on the page where the picture you want to recreate this effect. Find the section ID next to the required section and click on it once. Now the ID is copied into the buffer. Insert it next to other block IDs in the Custom CSS add a comma and a space, and click Save.
7. Testimonial slider with a border
The testimonial slider with borders is placed on the sales page. It is a testimonial section pre-made by Squarespace. To make changes to this section in the page edit mode hover over the section to see a pop-up menu. Click Edit content. Here you can edit content and design: add images, swap text, change the number of rows, and even the whole layout.

The borders of the cards of this slider are set with CSS. Go to Design > Custom CSS and find this snippet:
// Border testimonials block
.white .user-items-list-carousel .list-item[data-is-card-enabled="true"] {
  border: 0.2rem solid #000 !important;}
You can change the color by replacing HEX code #000 and make the border thicker or thiner by manipulating border value which is not set to 0.2rem.
8. How to add podcast episodes
In this template we store podcast episodes in our second blog that is placed in the Not-Linked section and is called Podcast. It has an ink pen icon next to it.

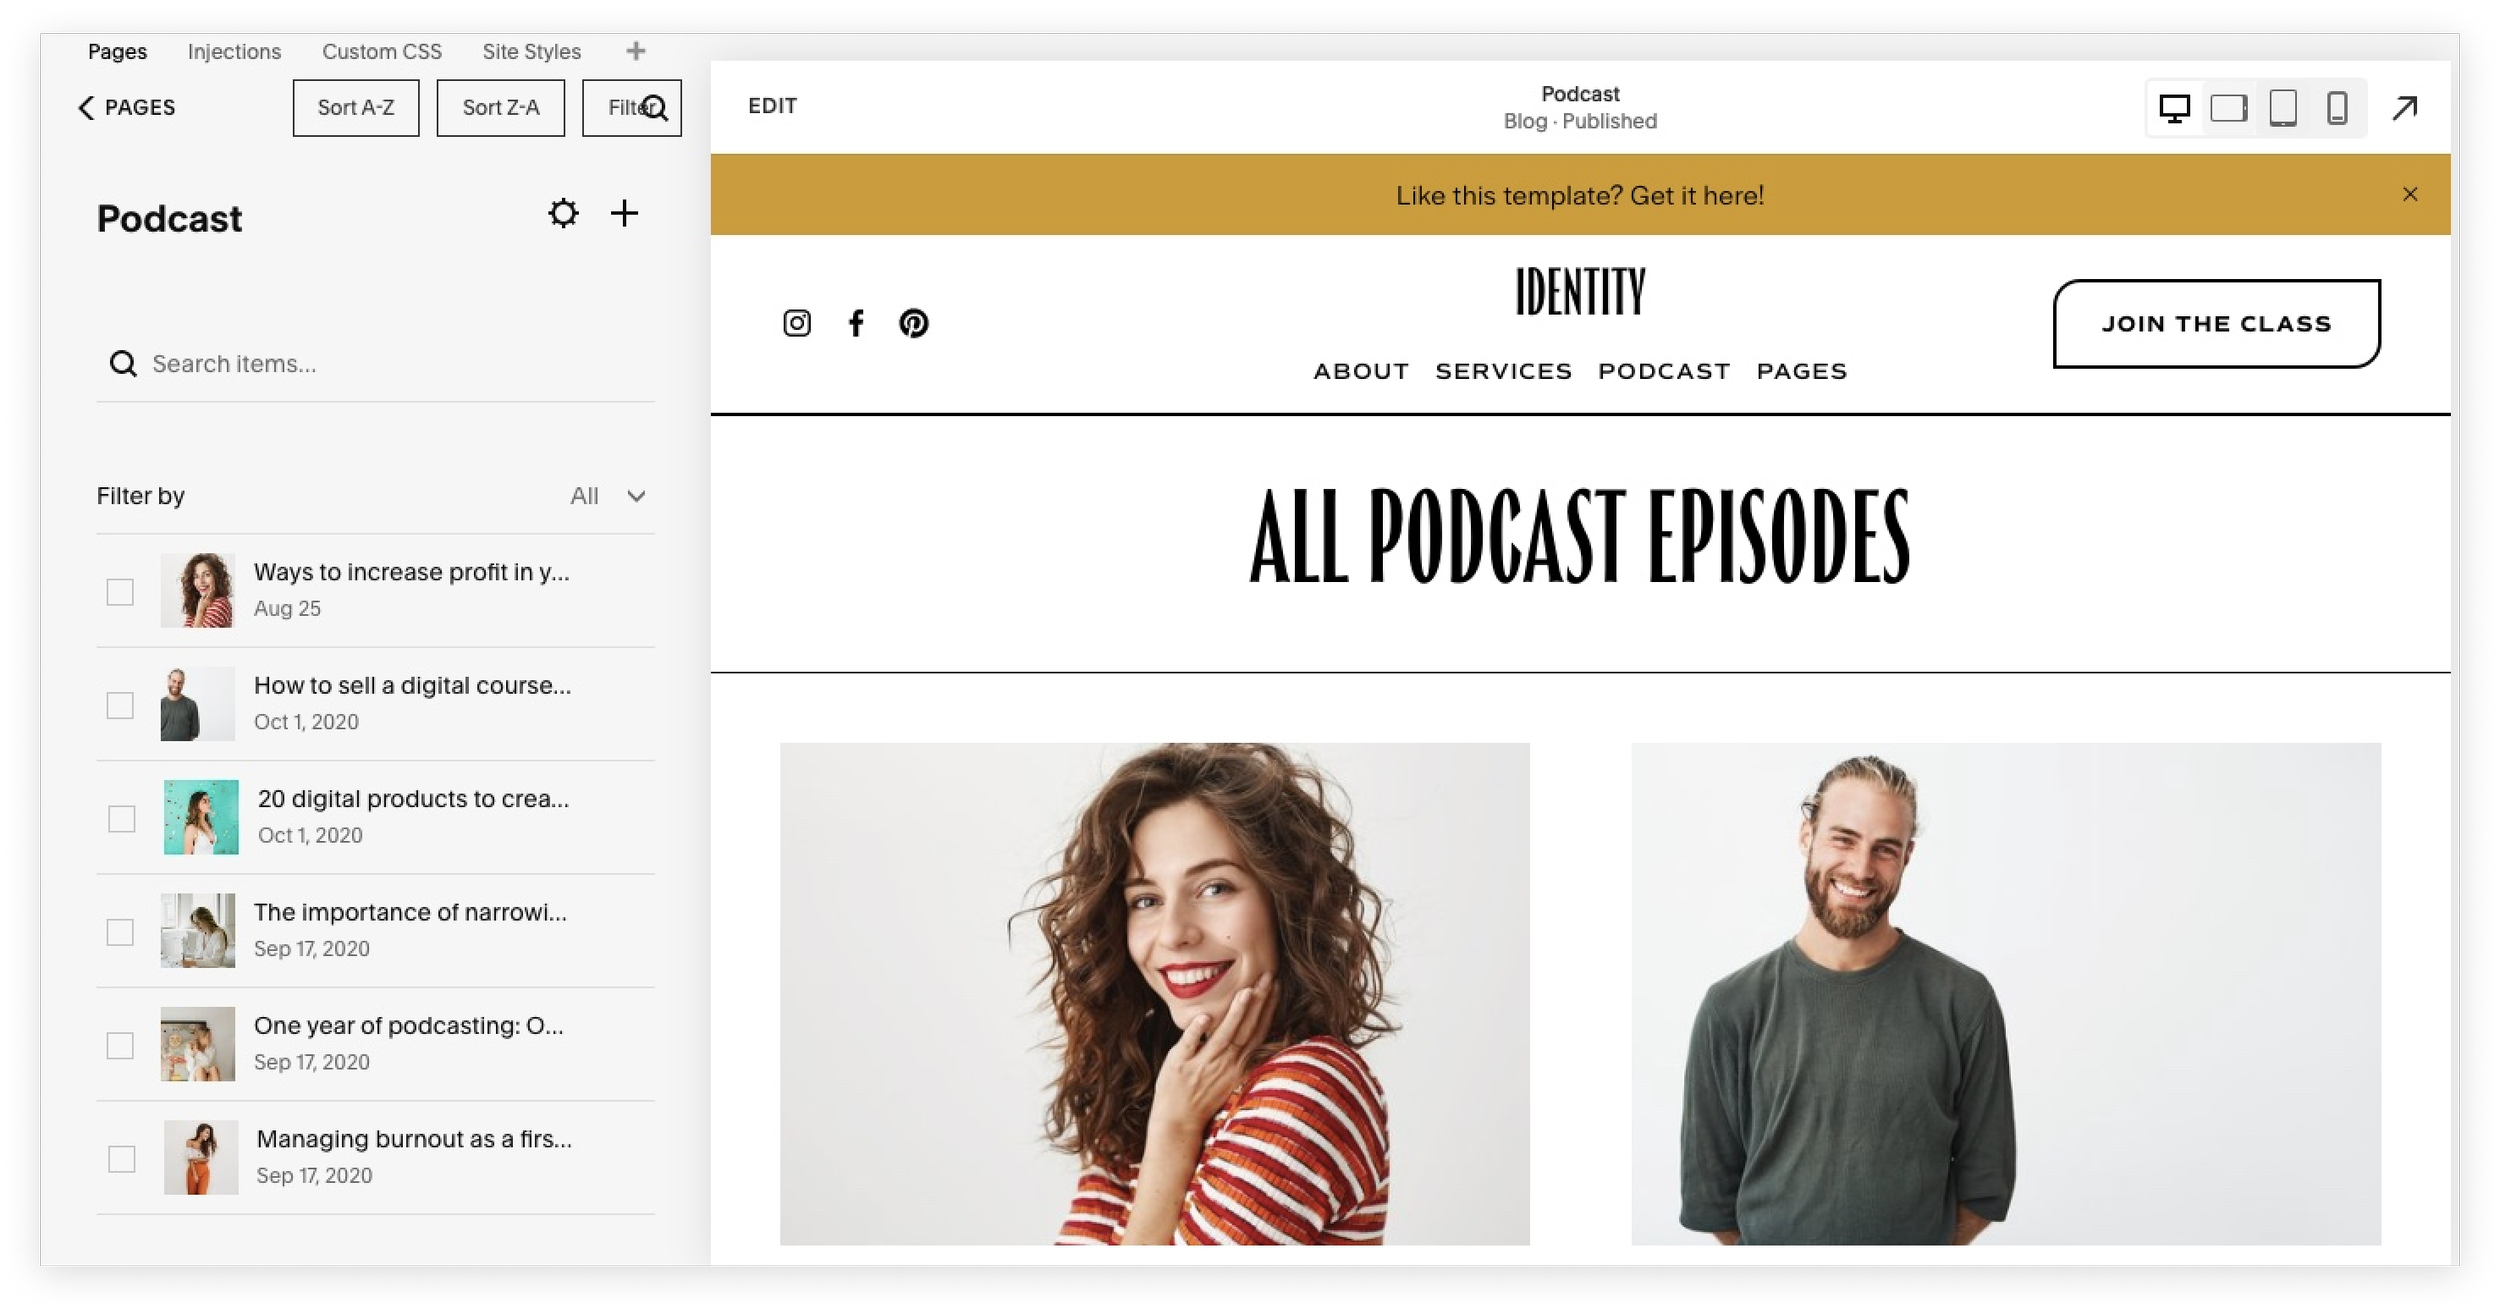
Add your podcast episodes as separate blog posts with audio files inside the blog post. To add the picture and the description, click the three dots next to a blog post. Click Settings > Content and replace the image and description text.


The actual Podcast page your website users will see is placed in the main navigation. It allows more freedom in adding different sections. Scroll down to the Listen to the latest episodes section. Here we use a Summary block to display episodes from the Podcast (blog) page.

To edit a summary block click it once and click a pencil icon. Here you can select a page the episodes are drawn from (Podcast blog ) and design the summary block itself. You can swap grid look for a carousel, a list, or a wall.